Since we're eventually moving, this project has taken a bit of a turn, and I started drafting this post before the Mr. and I made the decision of a lifetime. So a few of these items are on the back burner, until we have a new stove in a different house.
I guess we should talk "objectives". You should know what I'm trying to do by now, but there are a few goals/specifications that I have in my head, and I'm not willing to compromise too much where those are concerned. Without further ado:
I guess we should talk "objectives". You should know what I'm trying to do by now, but there are a few goals/specifications that I have in my head, and I'm not willing to compromise too much where those are concerned. Without further ado:
- Make very efficient use of any and all available wall space.
- Keep (frequently used) tools and materials visible and accessible.
- If they don't make storage that works for me, make it myself.
- Put everything on wheels. Everything.
- Upgrade cheesy storage. Find/make/repurpose sturdy well-made items that are built for hard labor. (Use plastic dressers for lighter duty/lesser used items. Avoid cardboard boxes wherever possible.)
- Find a balance between functionality and loveliness. Retain some semblance of personal style, however crazy and bizarre it may be. I like a lot of styles, and I don't care if they don't "go together". I didn't go to design school, so I have no rules. Ima do what I want.
- Don't spend a fortune. (Beg, Steal, Borrow)
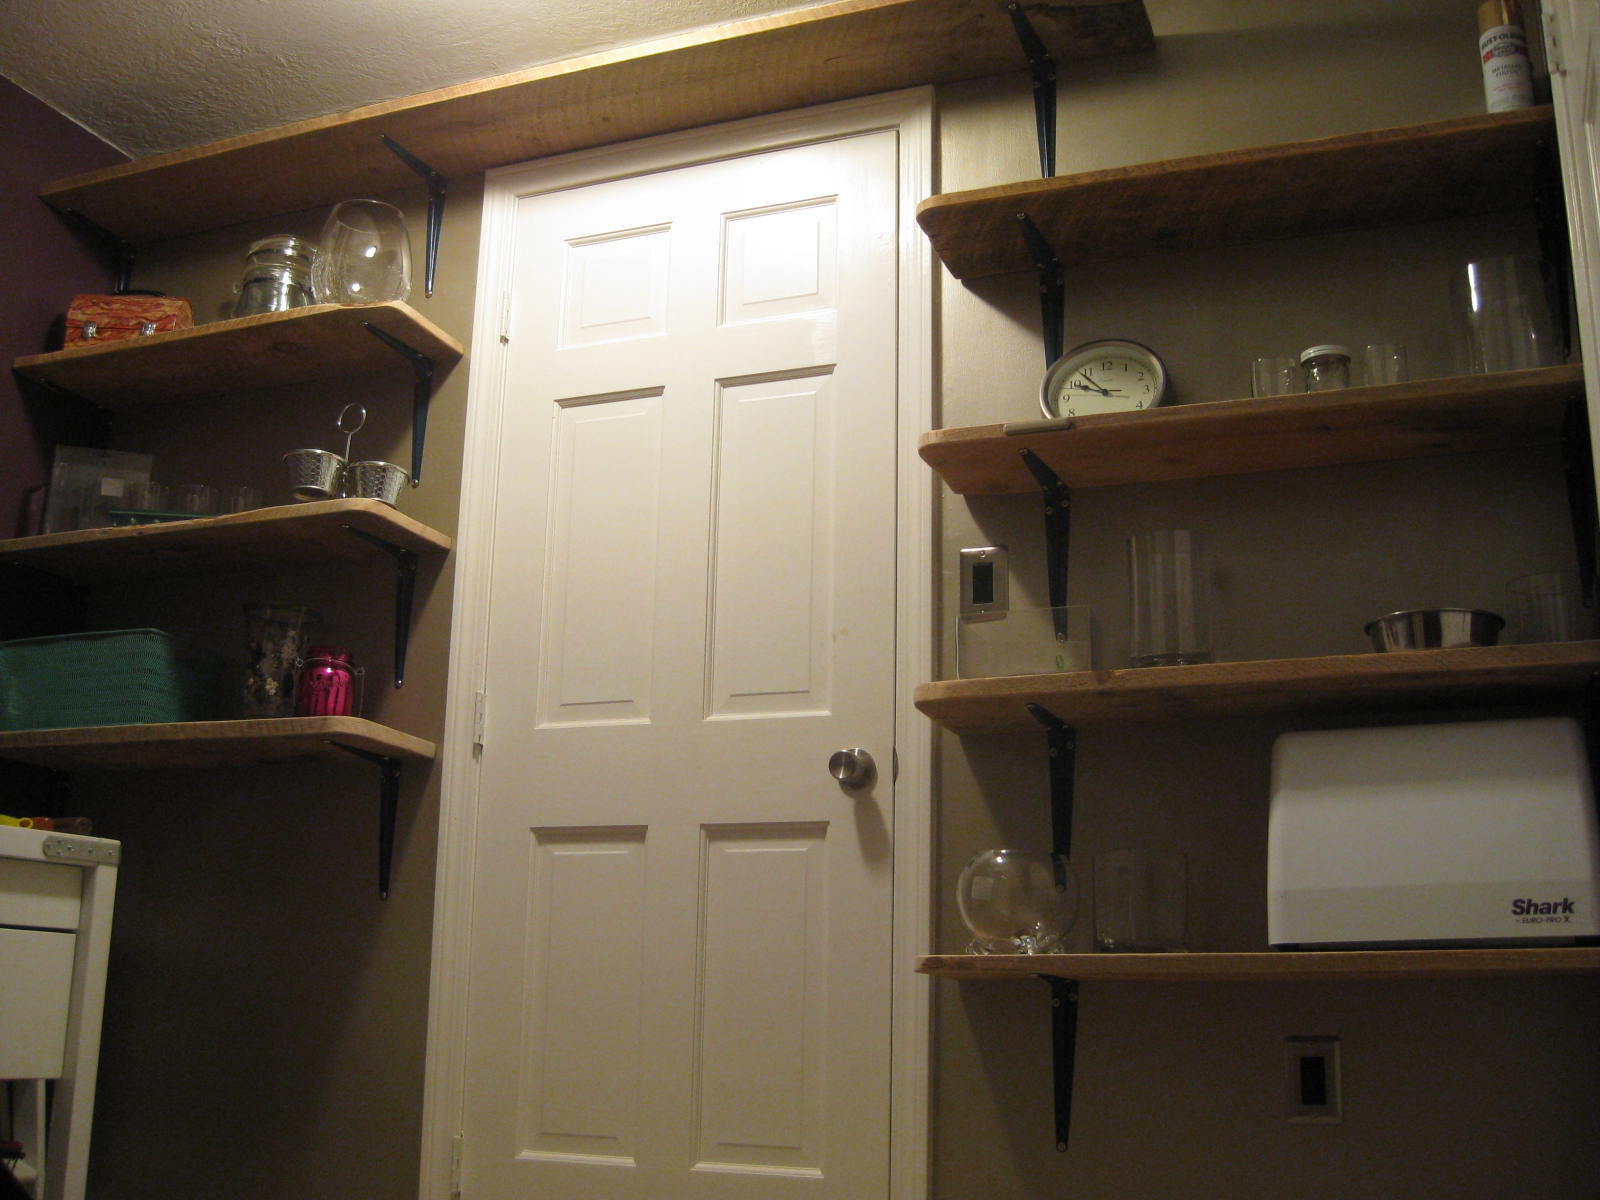
I've made progress on the use of wall space. I ran over to the wood shop (mentioned in previous posts as a great free resource for tools/supplies) and grabbed some old barn wood that was lying around. It's water stained, and I love the streaks. I'm leaving the wood rough, like me. I loaded it up on the old kayak racks and hauled it home. I picked up these simple brackets at the hardware store for roughly $1.25 each. I hated how boring they were, so I also grabbed a can of dark teal spray paint that was on sale for 93 cents. I also got some cool washers and screws to give them a little more visual interest. In the end, it probably cost me under $40 to get all of that storage. Don't hate the player, hate the game.


Am I crazy to love the streaks of discoloration in the wood?...

Cut 'em down, rounded one corner on each shelf, just so I don't hurt myself on them in the future. Minimally sanded, just to get any big burrs before they get me. HATE splinters.

Here comes the heartbreak. I didn't get to do the vintage wallpaper I wanted. The seller had just barely enough to cover the wall, but there would have been no extra left for matching up patterns, off-cuts, etc. I didn't want to pay $9/yd only to have it not cover the whole wall. Balls. I'm super bummed.
The paint on that wall is a pewter-ish metallic, so I guess it's cool enough. There's going to be enough distracting stuff on those shelves that you'll never notice the walls anyway. I hope.
I've been buying a bunch of stuff to make some custom storage pieces. Mostly bits/parts from craigslist, free wood from the wood shop, and a couple of furniture pieces. I called one craigslist guy to buy six large steel wheels from him to make a custom tower to hold/display fabric. He ended up letting me pick his storage unit. Twice. I got a pretty good haul from him for what I thought was a pretty reasonable price. The wheels are going to make a pretty neat piece, never seen anything like it. I'm hoping that my knight in shining armor doesn't mind sandblasting them for me so I can paint them pretty colors. That just means I have to wait for them... *sigh* ...another project that won't be completed for months.

But I also got a large piece of aluminum diamond plate which means... I'm finally getting around to following through on my original vision for my workbench. It's been 2 years waiting. I spray "lacquered" it white (using appliance epoxy paint for durability) and changed the pulls when I got it, but I'm also adding some additional hardware and refacing the drawer fronts in diamond plate. Because I need a workbench as badass as me. The bench might be the only item that won't end up on wheels. I like it right where it sits and don't see a need for it to be mobile.

I'll likely use more of that aluminum around the room, I have a few places I'd like to see it happen.
Like on this "kitchen cart" I picked up on craigslist for $30. It doesn't look like much but it is heavy steel and cast iron. I'm stripping all 80 layers of paint off it (probably lead, whatever), re-priming and painting. I'll likely cut a piece of that aluminum for the bottom shelf, just for looks. I'll be adding casters (naturally), and using this as additional workspace.


The refinishing of this cabinet is one of the things that'll have to wait until after the move.
I had told mom about my wall of shelving, and how I wanted to be able to see all of my supplies. My solution for that was to use clear/wire/mesh containers almost exclusively. I have a few jars, baskets, vases and such, but definitely not enough for the barrage of crap I'll be flooding those shelves with. I've been wandering around the thrift stores searching for the right pieces until... Mom was feeling generous, and we went to Homegoods. Always a pleasure. I stocked up on clear vessels in copious quantities, and a couple of bitchin' baskets, too. Thanks, Mumma!! (I've mentioned how cool my mom is, but I still don't think you fully comprehend).
Getting back to the (abandoned - everything's free) workshop... I grabbed two of these small workbenches, and I'm going to get another. I got some mini tennis balls for the feet, since some of the plastic protectors are missing.


I took a few pieces of Peep's (the late wood shop owner) carving wood, too. It's thick, heavy, and will make some amazing custom storage pieces.

One of the custom jobbies is a caddy to hold my entire miniature lumberyard (except for the scrap-bin). Here's the parts for that unit and a dry-run to check for fit, and then being the ogre that I am, inadvertently knocked it over:


I hate myself sometimes. I had to walk away.
Was just waiting for a 'friend' to help me build the thing (he keeps blowing me off, like a douchebag). But then again, who needs that degenerate?! Not this girl...

These are the awesomest looking casters.
All steel, no plastic. Just like me.

That front empty space (on the left in the aerial shot, above) is going to be filled up, I'm still sourcing materials to finish the compartments.

Yep, that's a spice rack.

And here's how it rolls perfectly into place next to the workbench. Nevermind Godzilla, she thinks everything is about her.


The other is pretty easy, it's a block to hold all of my dremel/drill bits and attachments. I know I need to have a minimum of 112 holes drilled to store all the bits/parts. I have a shit-ton of bits, believe me, I had to count them. I don't even know what half of them do, but I'm itching to find out. The harder part of this is that I want to build a box-style floating shelf, the bit block can be displayed on top, but in the box part, I'll put my dremel tools/boxes. I have a standard electric rotary tool (same concept as Dremel, but it's a Craftsman), I have a Dremel engraver, and their contour sander. I'd like all of these to be stored together, because they're obviously a clique that thinks hand-tools are for losers. The hot chicks: wood burner, heat gun (plastic soldering), soldering iron(s), (and torches, eventually) will have their own special place, too. I feel like I'm back in my high-school cafeteria, stereotyping who sits at each table.
There you have it.
That's all for now. I'm drained, and we're only a week into being 'on the market'. We've had one couple come to look our house twice so far, and we went to check out a real dive last night. We liked the lot and location, but the house needed to be condemned, or at least ripped down to the foundation and rebuilt. I can't believe they have kids living in there.
Needless to say, the wine's been going down pretty smooth these days.
Later, dudes.
I LOVE YOUR WOOD HOLDER! I need one.
ReplyDeleteThanks! It's the first custom storage piece I've designed and built so far, and it's coming along slowly but surely. Once I have it finished I'll do a post with tips/guidelines for how to make one for yourself, hopefully with additional ideas for customization. If I can do it, anyone can :)
DeleteI'll likely make something similar for all of my metal supplies... you know, in all of my free time. HA!
I'm so going to steal your lumber holder idea! Never in a million would I have thought of that.
ReplyDeleteGo for it! It was a pretty easy build, it's finding all of the right pieces/parts so that they fit together that gets tough. Which is why mine's still not finished. I'd rather have unfinished products, than hastily/poorly finished projects. Getting closer though. I've got my eye on the container store... just waiting for the paycheck :)
DeleteAwesome! I hope some of these can work for you! And don't think that I've forgotten about that brass bed for you. I'm still trying to decide if I should
ReplyDeletea) draw up some plans and send them hoping you can make sense of my terrible sketching
b) prepare all the materials/instructions and sell you the "kit" to build yourself...
and/or c) direct you to my (hopefully not-so-distant) future Etsy shop. I'll be selling them as a (made to order) finished product, too (I think).
Hope you aren't in too much of a hurry, could be at least a few more weeks before I come up with anything. I'm eyeball-deep in to-do lists right now, the whole selling the house thing screwed me. But I keep your comment notification e-mail in the inbox to remind me :)
LOVE LOVE LOVE your wood rack! I NEED one of these! So much better that having pieces of wood sticking out in precarious places. Waiting for those instructions... :D
ReplyDelete