Friday, April 20, 2012

Tutorial: Simplest way to electrify a dollhouse

The title is important. This post is about electrifying a dollhouse, not really wiring one.
If your dollhouse is already done on the interior (or comes with pre-decorated panels), save for electricity, this is your post.
If you have unfinished walls/ceilings/floors, read no further (You should do things properly, and tape/round wire your dollhouse prior to adding paper/paint/flooring). And hang tight, I'll do a tape-wiring tutorial when I can.

I've heard from many of you that the idea of wiring and electricity is overwhelming/scary/intimidating. You're just psyching yourselves out for nothing. I knew nothing of dollhouse wiring prior to "I'm a Giant", and now I feel I'm unstoppable. All I did was read the manual that came with the wiring kit cover-to-cover before I started touching anything.

But no doubt, some of you have finished houses and wish you could take it a step further with lighting. I hear ya. As long as you aren't as into the exterior appearances as much as the interior, we're safe here. This method is best suited to wire a dollhouse that will live with one side against a wall. This would have worked for my dollhouse, since it's just a plywood box with no exterior finishing except for a coat of paint and some window trim. (And until me and my saw, had no windows or doors on the back either).

It's possible to minimize the eyesore, and I'll help however I can with ideas.

First off, I'm not particularly adventurous when it comes to brands. Once I find a product I like, I generally don't stray too far. I use mostly cir-kit (and cir-kit compatible products). Sometimes as you'll see, in the absence of a cir-kit product I use the made-in-China knock-off equivalent. I haven't had any problems yet.

This is going to be a very short tutorial, here goes. I'll be using Lilly's dollhouse as my example.

Pick up a transformer that is sized appropriately for your dollhouse/lighting needs. Keep in mind, the 'volts' and/or 'milliamp' (ma) draw for each fixture. There are tables like this one all over the internet to help with that:

TRANSFORMER CAPACITIES

Cir-Kit Concepts (*circuit breaker protected)

 I scraped this table directly from Cir-Kit's website, so I think it's safe to trust the data. I'm sorry if it was illegal? I recommend choosing a circuit breaker protected transformer.
If you go this route for wiring, be sure to use only 12V and 16V bulbs in your fixtures. Do not buy/use anything labelled 1.5V (unless you do 1:24 scale). Those micro-bulbs are cute, but don't be fooled, they need a special transformer.
When I do any light fixture tutorials, they'll involve 12V screw-base type bulbs (unless otherwise noted in the tutorial). One or two of those is enough to light any (reasonably sized) 1:12 scale room.

(Only recently have I started dabbling in 16V GOW/GOR bulbs. Probably should explain that...
GOW: Grain of Wheat bulb. The smallest bulbs (that I'm aware of) used in 1:12 wiring.
GOR: Grain of Rice bulb. Slightly larger than a GOW bulb, same draw on current.)

You may have seen these in the last post, sorry to re-use pictures. But they're relevant:
I selected this transformer for Lilly, because her dollhouse has about 5 or 6 rooms, and I knew we wouldn't exceed 10 fixtures. Easy choice, nice price ($17).  
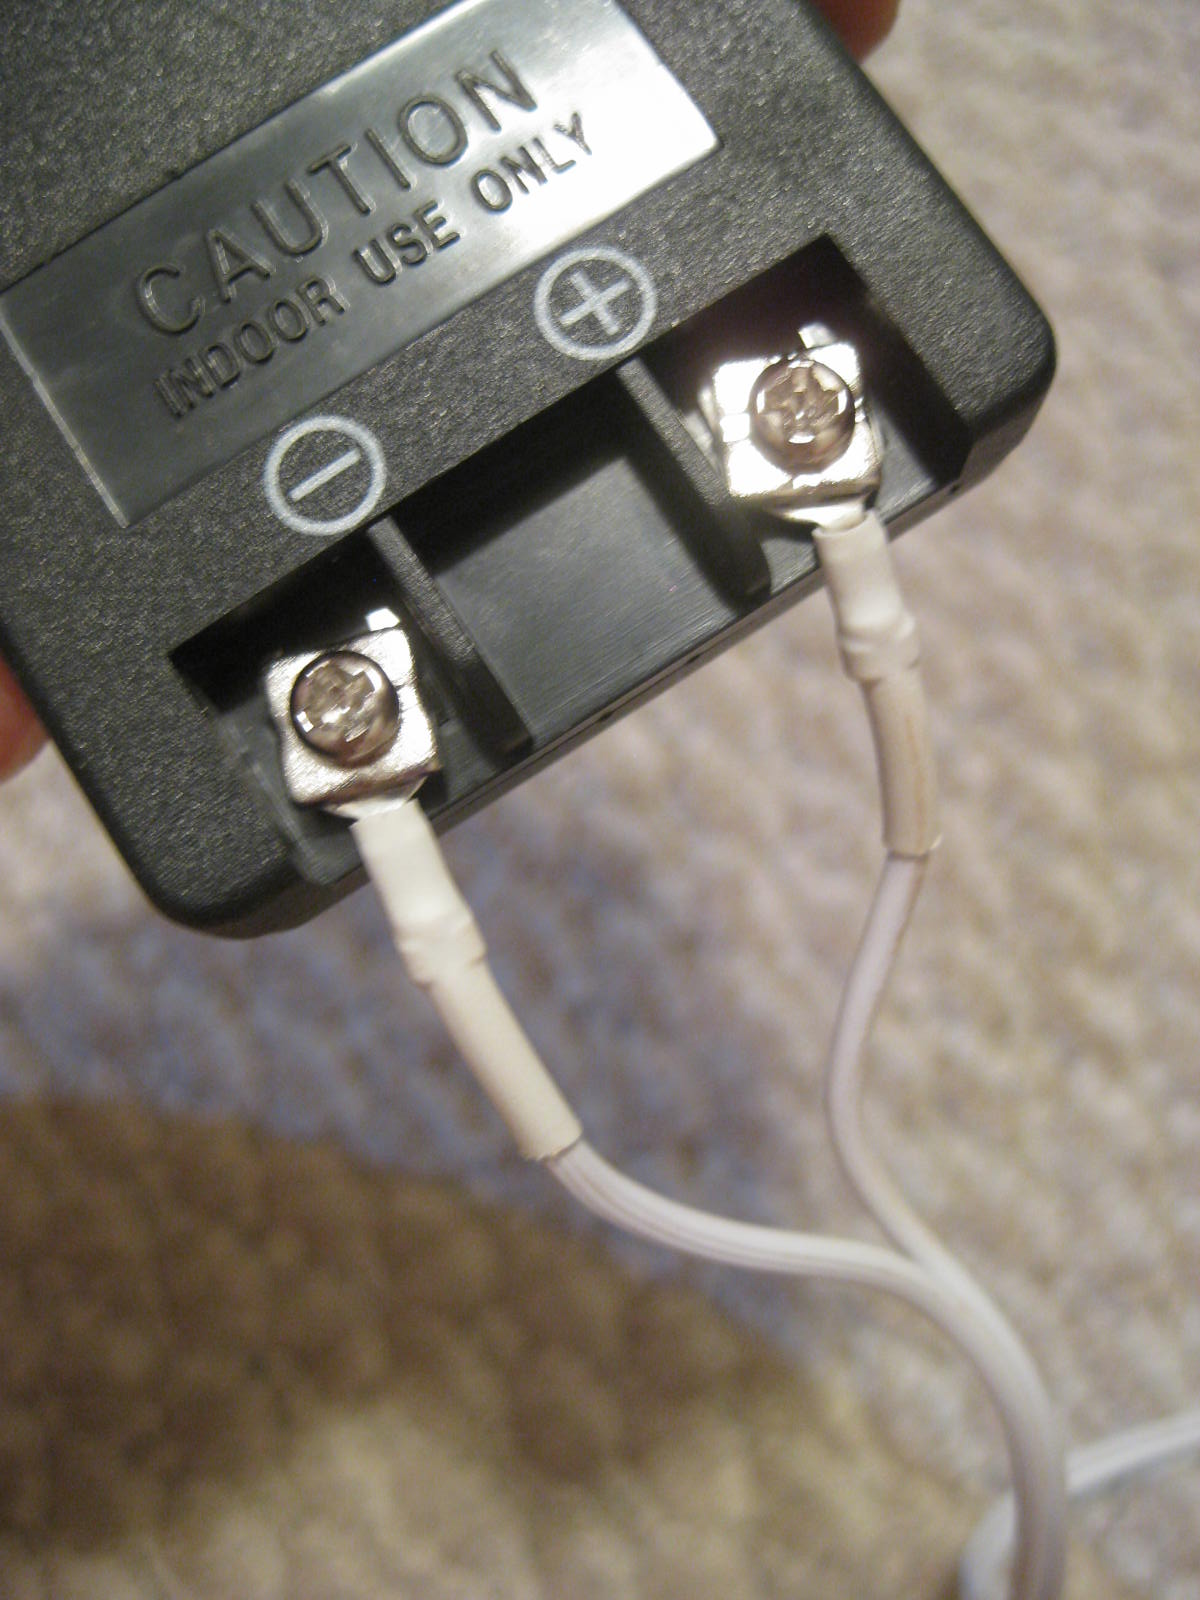
The power strip connects directly to the terminals on the transformer. Once you have them connected (the only tool required is a screwdriver), you're halfway done. Crazy, right?

The powerstrip shown above was about $11 at a local shop. It's fuse protected, and has a sliding on-off switch. The toughest part is figuring out where to put it on the dollhouse. This one has double stick tape on the back, and since Lilly's house is 4 feet tall, I tried to locate it centrally on the back of the house so all of the wires on the fixtures would reach.

Once you stick that to the house and plug it in, you are officially done wiring your dollhouse. See how easy that was?! Told you so.

Then there's the fixtures. I make all of my own. So I guess I can't tell you if store bought fixtures come with a compatible plug. I can show you the plugs that fit, but after that, you're on your own. If the fixture package says cir-kit compatible, plug-in, tape-wire, or any of that crap, you're probably safe. You can purchase the plugs that fit directly from cir-kit.
Here's what they look like:


You can add fixtures one-by-one, room-by-room. Here's how you do it.

Choose/make your fixture, and decide on its location in the room.
Hand-drill a very tiny hole (I use a(pproximately) 1/16" bit) in an inconspicuous area near the ceiling/floor that will leave the shortest amount of wire in the room. 

Here's the general appearance. You can even adjust the height of the fixture, as long as your wires are long enough. I don't think it looks too bad, especially since it makes it so easy to change fixtures from room to room. You could change your kitchen pendant, as often as your shoes. Think about that. Ladies.


If it's a ceiling fixture, I recommend drilling the hole as close to the ceiling straight behind the fixture on the back wall as possible, if possible. That way, everyone's eyes will be on the light, and the wires will be mostly hiding along the ceiling then disappear through the wall. Like friggin' magic.
 To hang these fixtures, I've used small 3-M command wire clip thingys. They look like this:

Practically invisible. Cheap, too.

If it's a floor fixture, do the same but drill the hole along the floor on the back wall, and hide/minimize the wires to the best of your ability. If you care. The wires are to 1:12 scale, so they don't look bad coming from a floor lamp. Adds to the realism I guess.

Sconces are where it gets dicey. Sconces would need to be located on the same wall as the power-strip, unless you want wires everywhere. Either way, you would drill the hole at the sconce location and mount the fixture to cover the hole. Easy as pie. I love pie.


So you've got your fixture, and you've got your glory hole drilled in the wall, and a bunch of pictures of how good it can look... you're hoping I don't leave you hanging. 
This is the scary part, wires, and plugs, and splicing, oh my!

I gotcha gurrl. Stay with me.

For ceiling fixtures: You attach (semi-permanently, or eternally. your choice) your fixture in the desired location. Thread the wires from said fixture through the pre-drilled hole. Make sure that they reach the powerstrip (+2 inches or so). Then do the following:
Cut your wires clean, keeping them as long as possible. Thread the wire through the plug as shown. Splice the wires using an exacto blade. For best results, slice a small length (1/8-1/4") then pull the pieces apart to about 1/2". Make sure there's no bare copper showing yet.
Strip the insulation off of each wire, about 1/4". I use my fingernail to gently pinch and pull the insulation off. These wires are pretty fragile, and I'm like the hulk. I screw it up all of the time.
As you pull the insulation, twist it. This will keep your wires more manageable for the next step.
Bend one wire (it doesn't matter which one goes where) in each of the side holes, make sure there's distance between the two bare copper wires, or your system will short out.

Add the brass plug pins using pliers (if you care about your fingers).

You're ready to plug it in and turn it on! Boom.


It's not going to win any beauty pageants. 

I'll tame Lilly's wires once I decide which other fixtures I'll make. Lilly's dollhouse is going to live against a wall, I've been told. So there was no pressure to make it fancy and hidden.So there's my justification for that mess. Poor form on my part, but I'll fix it before I finish up.

I think that's it for this one. Next is the simple pendant tutorial, so you can make a custom fixture. So rad.

If you have questions, drop a comment. I'll try to reply as soon as I can.


Monday, April 16, 2012

So, I built my first dollhouse last week

Serious. I did.

So a little background...
Ever since "I'm a Giant", I've been making tons of silly crafty things that very few can appreciate. I love to show people at work my stuff, but generally they're left bored, unimpressed, and irritated that they'll never get that five minutes of their life back. But there was one woman, who obviously has exceptional taste (sense: sarcasm), and was always eager to check out my stuff (read: easily amused). We'll call her Sue, because that's her name.
Sue has an adorable, vivacious three year old granddaughter named Lilly. Sue also has the arduous (yet rewarding) task (blessing) of being the sole guardian and caretaker of said lovely toddler due to indescribable tragedies... at a time in her life where she should really only have to think about retiring and relaxing. Which brings me to the dollhouse. 
I love doing nice things for nice people who deserve it.
Sue purchased a playscale dollhouse kit for Miss Lilly around Christmastime. She heard around the water-cooler that Meagan was "into miniatures, doing up a dollhouse, probably has thirty cats (and a drinking problem)", so she asked if I would mind assembling it.
"No sweat!", I said. And then I proceed to show Sue some pictures of my work via the blog.
"Electricity, working lights?!?!", Sue exclaimed with glee, "Well, I want that for Lilly. I want Lilly's dollhouse to be special!". I proceeded to tell her that lights wouldn't be a problem (before seeing the dollhouse kit) and got her hopes up for something phenomenal. She got all excited that I said I'd do it, and got online to show me which kit she bought. I was expecting raw plywood, millions of pieces, interior/exterior, flooring, wiring, trim, full-on dollhousing and shit. Nope not even close. Here's the kit:
Imaginarium Modern Luxury Dollhouse

So... not what I was expecting. Easier. Shwing! This is one of those dollhouses, actually suited for toddler play, strong as an ox (or me). The thing goes together so fast that Santa could open the box when he drops in on Christmas Eve, and put the thing together under the tree before Prancer can even mess on the roof. Or maybe it took about an hour. It even comes with one of the only 3 tools required for assembly (Alan wrench included. You'll also need flat and philips screwdirvers, not included). Everything is already done for you! Whatever. While there are undeniably some perks to this type of dollhouse, it left me with a bit of a dilemma...

Sue wants electricity! I said I could! This entire dollhouse already has the decor/wallpaper/floors/etc. laminated to perfection on the 1/8" fiberboard that makes up the back wall. Shit.

I'm a girl of my word, and I never start something I can't finish (although I did go all Emily Henderson on the deadline, first it was Valentine's, then St. Patrick's, but then I finally made it for Easter. Jesus was watching, for Christ's sake.) I never make a promise I can't keep, and where there's a will, there's a way (so I've heard). I went a-wandering through the electrical section at http://www.earthntree.com/ (their physical store not the website, but almost everything they sell is available online).

I found these for (about $30 total) and decided that it would be the best route.


That powerstrip has an on-off switch, is fuse protected, and plugs right onto the transformer in lieu of a traditional lead-in wire/junction splice. I bought a really small transformer because I knew we wouldn't exceed ten 12 volt fixtures. If you take this route (or any electrical route, for that matter) make sure you buy the proper transformer for the size of the dollhouse/# of fixtures you expect. If you're unsure, e-mail me and I'll see if I can help. I'm by no means an expert, but I'm not a first-timer either.

I had been brainstorming and losing sleep about hiding tapewire, and having to do the origami method because the brads won't hold in the fiberboard (like I'd hammer on it anyway)... blah, blah, blah. Then these found me and I thought, this could work with minimal wiring showing. It was the only way to do it in a reasonable amount of time, without damaging the pre-decorated panels. So, that being said, if you have a finished non-electrified dollhouse that you'd like to see some real lights in, this method may work for you. I'll write a separate post detailing the how-to's and what-have-you's. When I can, you know, later.

Aside from the above supplies the only expense is in the light fixtures themselves. And I'll be showing you how to do one of those, too (again, in a fresh post, coming soon).

Anyways, last week I delivered this gargantuan (almost as tall as me), yet very chic, house for Lilly's Barbies. I have it on good authority that she's thoroughly enjoying it, which makes my day. Thanks again to Sue, for pulling me out of my 1:12 scale, tapewiring, direct plug-in fixture comfort zone. I needed to learn something new, so I could show all of you something other than the same ol' crap. But since I've finished it, I think I'll head right back into that 1:12 comfort zone of mine.

Until then, here's how Lilly's house came out, with some close ups of her custom lighting! (I still owe her one or two fixtures, I'm sure Sue will help remind me :) She's good like that.

The elevator from the first floor to second is operational (not electric)! Just a flick of the wrist!


Any furniture you see came with the kit, including the non-working arc lamp in the living room and the double-drum pendant in the bedroom (also non-working)...

But I figured, depending on the construction, that I could do something with the damask fixture. So I ripped it apart (I didn't think Sue would care, she was clear that she wanted working lights, at least one fixture per room). So it came apart super-easily and I slipped a bulb into it. No problemo. That was a gift of time from God himself.


Cakewalk.

I managed to salvage a brass polyhedron attempt from the scrap bin as well. I had originally designed my brass arc lamp (as seen in a number of previous posts) to have an asymmetric shade, but being a typical girl, I changed my mind four seams into it. So there it sat, in the pile where old projects go to die, until I realized it could be a playscale pendant.


So I finished the seams (They aren't perfect but let's face it, it's for a toddler. Pardon the honesty.) I added a teal Swarovski crystal I had on hand to match the decor. Not being a true designer/decorator, it's hard to come up with designs to fit spaces that are already decked out (especially using only materials I had on hand). It's cute enough, and I feel like it fits in the room just fine without sticking out like a sore thumb...


And finally, the bathroom fixture. I think this one matches the decor the best (except for the one that came with the kit, of course). This is the pendant I'll be showing you how to make in an upcoming tutorial, except for the finishing touches. It's a classic, versatile globe style that is inexpensive and easy to make, yet extremely customizable. You'll see. Here's an inspiration photo of the bathroom decor, followed by the fixture I made:


Not a bad match, I added the brass studs (as seen on my 4-poster bed) to tie in the brass from the kitchen (and the polka dots on those vases), and lucky for me, I already had the teal spray paint.
 
(Zoom out view on the custom lights and their respective rooms)

 But in the end (all of my attitude and foul language aside), here's the best part, and what really matters:


Delivery day! She couldn't be any sweeter, and she deserves to have the coolest Barbie house in town.

Happy dollhousing, Miss Lilly!!


Friday, April 13, 2012

swapping some swag

Yo, yo! Long time, no talk. I've missed you guys.
I haven't posted in a while, but I've been here 'in spirit'. I had a bunch of little projects going on, so there'll be a few posts this weekend detailing that stuff, plus a long-overdue tutorial (or two and a half). Feast or famine around here, I guess. Finally, a weekend sans obligations! Practically peeing my pants with excitement. If that's "TMI", you must be new here. Welcome!

So the first item of business is showing y'all what I made for Mini Dork. Poor soul, I made her wait practically forever for this mediocre crap, but it's my mediocre crap, so I'm proud of it by default. Kind of how you have to love your kids, even if they're ugly (thanks again, mom).
I took the liberty of playing with the stuff before I sent it out, took some quick snaps. I know she's recieved all of the packages I sent, so no spoiler alert necessary. No doubt she'll totally knock it out of the park when she makes and photographs her scenes. She got game.

I made her a mini modfire since I told her I would. Here's how that came out:

It's made of 36ga brass underneath. She requested white laquer, and I was happy to oblige. It looks totally boss. But something was missing for me. It left me wanting.

Dammit, this thing is supposed to be a fire pit.
 Shazam.
 I guess I can add "miniature fake fire" to my list of can-do's. It looks convincing enough for my house, so I mailed it to hers.


 Naturally, I had to pretend it was for me...
 if only for a fleeting moment.
I may have only had one night with it, but it was a night to remember.
Then I had to package all of it up for the long trip to Cali.


The modfire has as many attachments as a friggin' Kirby.

Silliness. The 'required equipment' is the copper pot-o-logs. I don't think the modfire by day/night parts need further explanation.
After blog-stalking her I decided to throw in a surprise, too. I saw this post, and figured it was a serious throwback (being a post from a half decade ago), but do-able (maybe?). I was pantshitting nervous about these, because:
1) I wasn't sure if in the past 5 years she'd found them in 1:12 (or had them made).
2) Could I make them, without them looking like a kindergarten craft project?
3) Once completed, they would be extremely delicate. Would they survive shipping?
4) One of my weaker skills is in the finish (paint/stain), could I make these look sleek and smooth, like the West Elm versions? (below, in Barbie scale I believe)

West Elm circa 2007


I know you're all on the edge of your seats, dying to know the outcome of this thriller... so here:


They aren't quite a 'perfect pair', but that's because they were individually handmade. They're pretty close. And I tried to make them slightly different than the originals from West Elm, because I like to put in my two cents. They're made of walnut, with the exception of the fretwork in the seatback. That's just basswood. I would have used walnut there too if I wanted to make an extra trip to the specialty lumber store but I was trying to work with supplies I had on hand. And they were going to get painted anyway. They would've looked awesome natural, too (had they been entirely walnut, and properly finished as such). See?


But I digress. Girl loves herself some white laquer, and I (surprisingly enough) hadn't blown the entire can on the Modfire. You know what happens next. I pretend they're mine.


The bird totally ties the room together. I hate taking pics of those nightstands head-on, because you can always see my camera lens in the doors.

Better.

Making them brought back memories. The process was similar to the one I used to make those mini-mirrored nightstands. So. Much. Mitering. In the end, I was pleased (read: satisfied, not ecstatic) with the outcome. I wish I could have sent her a 'second edition' after I worked out the bugs in the fabrication. There are two extra coats of laquer on them that I wish I hadn't needed. These big hands are constantly smudging an otherwise lovely finish. Sand and re-spray. Rinse and repeat.
But they photograph okay, so all is not lost.

 Should've turned on the arc lamp to help light the shot. I'm such a loser.

Then I packaged them individually, and obsessively.

It's near impossible to break the legs off, they're all reinforced with mini rebar that runs 3/8" into the legs, through the seat, and another 1/4" or so into the arms and back. But if they got tweaked, it would certainly screw up the already dicey paint job. There was a ton of foam holding everything in its place.


The pair fit nicely into the box from my Garmin (thanks to my Mr. for birthday-gifting me one of those), but had to add that note in order to not get her hopes up. There were post-its everywhere in those shipments. I love a rude handwritten note as much as the next girl. Yep, that's Disney Princess scotch tape.
Don't judge me.

I wrapped all of the packages in matching brown paper with ridiculous, completely irrelevant zoo animal stickers all over them, and put all of my faith in the US Postal Service (but not without insurance and delivery confirmation, obviously). I'm dumb, but not that dumb.

And at their final destination, I've been reassured, they arrived unscathed.
They all lived happily ever after.

The end.