Showing posts with label time travel. Show all posts

Sunday, January 27, 2013

I may be white trash, but my trailer's a treasure.

 No, that's not a Honey Boo-Boo quote. That's a TinyFixation original. 

As you may have read, I'm getting a new workshop. That's enough to thrill even the least-obsessed crafter. I'm a craftsperson of the very obsessed persuasion, and dammit, I've outgrown my craft palace.

This is how you may remember it:
 The main bench usually looks as above, but messier.
 ...and when it's clean.
 It actually doesn't look anything like this any more. There's been more 'organizational evolution' (if that's what we're calling it, like a garbage man is a 'sanitation engineer') since you've last seen it. Guess I should go grab a pic or two of that nonsense... just a sec.

Yuck. But I'm glad it looks like a shithole right now, just to illustrate a point. It can be workspace, or storage. Not both. A clockwise turn from the center of the room reveals catastrophe at every glance. I'm worried about my tools and projects getting lost, or *gasp* broken.

 
 Please, don't let the roombox cart hide this:
The piles behind it. Egads.
 And it continues...


It's so sad looking. I just grab what I need from the outer echelons and sit on the floor in the middle of the room. Or even worse... elsewhere. I've started leaching out into other rooms. The craft cancer is metastasizing...

...into the loft:

...and into the attic (through the other door in the craft room):


I'm even invading the garage. Band saw and dremel are down there on a current assignment.
We've spent a lot of great times in that 10' x 10' cubicle of a space, and boy has it been a nice place to play. 
 But this will not stand.


The dilemma is this: I really want a freestanding workshop structure, separate from my home. Our home is for sale. I'm not going to build a nice shed/cabin thing only to have to move out and start over again when the house sells. Ah, first-world problems. I'm just afraid if I don't finally concentrate and get started with TinyFixation on Etsy, I may never get to it. So I put both at the top of my very ambitious 2013 to-do list, a workshop and an online store.

I may have also mentioned that my husband is pretty brilliant. A man with a plan. I should have thought of the concept too, but seeing how we have the Winnebago as our recreational vehicle I never would have thought to buy another. He knew I needed more space months ago, after all, he's the one giving me all these amazing power tools for gifts lately, and wondering why I don't use them.

But a workshop on wheels is the ideal solution for my chaotic life and unpredictable living situation. It's also in our nature and history to buy old campers and redo them. This will be our third. He was going to get me one for my birthday but since he knows me like no other, figured I'd want some input. I'll be the one working in it. So we've been searching, with little luck at all. 
The trailer frame, roof, and enclosure need to be near immaculate. My favorite stuff is going to live in there. Bonus if the electrical, furnace, A/C, water heater, stove and range hood worked, but not any deal breakers there. 
The other features: dinette, couches, beds, toilet don't matter since I'll be tearing most of it out to make way for custom benches. The mice can keep the upholstery, for all I care. Enjoy, until I forcefully and brutally remove you with extreme prejudice. I hear you guys prefer peanut butter over cheese these days...

Bottom line: I need more square footage, more open, usable bench space. And some special considerations to make regarding storage since I have a small arsenal of tools and supplies for pretty much every craft except glass blowing. Shit, that sounds fun, man. So I wanted to double my square footage, and figured I could best do that in a 27' to 32' model.

So we've been around to look at three '80's era 30' to 32' slabs this month, all unfortunately not candidates.We had started calling on trailers that were 4 hours away last weekend, but those guys didn't call us back. Thank God.


Fast forward to this morning...
Vic is always on the prowl (sketchy as it sounds) on craigslist, for whateverthehell. Men.

Victor:
"Hey, here's a 29' Argosy.........
...Babe. It's an airstream."

It was 7:45 am, but no shit there I was. Couch jumping Tom Cruise style, screaming:
"How long ago was that listed? Call that motherfu*ker. RIGHT NOW!"

He's all:
"Well, let's see, where'd they list the number... oh, here,
234-(trails off...),
No fucking way."

I'm dying over here, all:
"What. What?!
Is there a problem with it? Oh, no. Is it a pile?
...or do you know this guy. Oh my God, you totally know the guy!"

Victor:
"Yup. And matter of fact, he owes me money."

So Vic gets on the phone with the guy, and we could go see it in an hour.
It has two broken windows, and the sub-floor is soft (if not removed in areas), mice have made themselves cozy, etc... but it had better bones than any of the newer model campers we'd seen. And it was old, and unusual, and had character! It's so perfect I can't even cope. It's exactly what I would have asked for if I didn't already know how expensive they are... I'd been briefed on the budget long ago. This is considered a very extravagant gift in our house. It was a gift, after-all, and I'd be more than gracious to get anything that could fulfill workshop purposes, however homely.

Which brings me to the real kicker. Go ahead hate me. It was free in exchange for forgiveness of his $500 debt. Seriously? An airstream for $500 (already under-budget), without even having to pay a dime?! Even I hate me for it.

She's a real fixer, but all four tires were in excellent shape (Tires alone = worth more than the price paid for the trailer. Ha!), so we were able to haul her glorious ass home today. I can't wait to give her a sponge bath. I think she's rough around the edges, but like me, will clean up nicely when asked.
 
 Hello, lover.


If you aren't pants-peeing excited over how beautiful that is, I don't think we can be friends.
Yep, I know. Rolling up my sleeves. Mouth guard, knee-pads, goggles...
 It's supposed to get up to 50F next week sometime, she'll be filthy until then. 
It was 20F today, so capital 'F' being outside.

I've been doing some research in the meantime.
airforums.com
 I've got the Argosy 28 twin bed center bath model. Date stamped on the trailer tag is 10/76. 1976! (I still have to do a VIN look-up to confirm). My floor plan is as seen (bottom left, in dazzling red), except the bathroom and closets are on opposite sides of the trailer.

I've found out that Airstream produced the Argosy line, which were a similar design/shape but painted. I looked on some forums and read conflicting information regarding their makeup. It's mostly aluminum but has a couple of panels made from galvanized steel. Tested it myself with a magnet. Mystery solved. I also found a full PDF manual from 1975.

I'll keep at it, and now that I've got some dimensions and a layout to work with I can start space planning.Our first steps will be to replace the two broken windows, put in new subflooring, and repair one leaky area. Until then it's pencil to graph paper, my usual process.
Which should be great practice since I have a basic plan for Undersized Urbanite.
I'll be doing up my dream Manhattan apartment, if I actually wanted to be a city girl. The catch, is that I could probably only afford 300 square feet. So it will be an adventure in cramming and creative space planning to make sure I'd be comfortable. I'm a girl who likes to stretch out.

I'll be able to construct a simple plywood roombox for this one. 
Nothing too fancy. Since 300 square foot apartment rarely is.
But only simple windows, and electrical. Nothing as elaborate as the roombox in that department.

Now that the cat's out of the bag, I guess I should get started on both of these projects.
Until next time.
P.S. About that other thing I said:
My husband also knew I wanted to drive in a demolition derby ever since he took me to watch my first, so this year he's secured me a car worth destroying for the sake of bumper cars: the real game. It's a 1996 Ford Escort station wagon. White (for now). 5-speed. October 2013.
Gonna be so dope. What a guy.

Tuesday, January 15, 2013

A swift kick in my mail parts.

Just what I needed. A friendly shove in the right direction.


My friend Megan aka: MiniDork from modernminihouses sent me a swap gift!

I came home after a regular shitty Monday at my day job to a pair of generously sized boxes leaning against my garage door. I thought nothing of them at first. My husband orders lots of car parts and tools for his business, so I never let myself get a thrill from seeing a package. It's generally heavy, and cumbersome, and he's got two hands. He can lug it in. But no...
I inched closer and saw that one was a very distinct CB2 box.
So it's obviously not for my husband, who would likely guess that CB2 was a Star Wars character. My heart was aflutter with anticipation. I bolted out of the car and bee-lined for the labels. They were both for me. Fully knowing how broke I am and that I hadn't ordered anything, I looked for the name on the return address and smiled big. These were going to be really fun to open. Attempting not to be a total spaz, I maintained composure, changed into sweatpants, poured a jar of wine, and fed the dogs to get waggy tails distracted from what would surely be fragile stuffs.

I opened the big package first, it had been directly under my drippy (flow-rate: Niagara) roof. I'm sure it was merely coincidental, since I have an awning over my front door. Whatthefuck,postalservice?
I was really nervous that the water had seeped past the cardboard and damaged delicate things. Lucky for me, the contents were in another box, wrapped in plastic. Safe. But holy smokes:

That's her best "I'm impressed".
A new dollhouse!! You've got to be kidding me. Way to overdo it, Ms. One-Upper : )
You said it wasn't a contest... right there on that sticky note.

Well played.

But then, oh, then...
The box marked "fragile".

Luckily, this one wasn't waterlogged.


What treasures to behold! This box was packed with awesome minis. Many of which were hand designed/made and that makes them all the more special.

She specified that some of these items would require assembly, which means that this post is mostly a tease. I'll tell you what I got, but I won't really get to play with all of my toys until this weekend. I fully intend to, with a follow-up post with pictures of it all styled up.

Shouldn't be tough, since my new swag includes:
an incredible geometric deer head sculpture, two amazing bookcases, loads of original limited-edition pillows, books (and the ammo to make more!), vases, six chairs, two tables, and a countertop/workbench, and an outdoor fireplace (in some pretty amazing packaging), brass fixtures, accessories and miniature flora (the flowering cactus kills me). Plus, I had already received the entire "glam accessories collection" which will also be featured in this weekend's scenes. You may have seen a couple of the pieces already in my cubebot entry.

Not sure where I'll set them up yet. Might be another job for the roombox!

So, sorry again that I've been delinquent on posts. Mostly because I started playing my violin in a local college orchestra, a little treat for myself (and subsequently my mom, apparently love is blind and deaf). And I handmade most of my Christmas gifts for family this year (a la Pinterest) and they came out beautiful, but it was all a total timesuck. I'll have a post about those items coming (and how Santa treated me), and another on my plans for 2013 including a demolition derby and a new workshop, and another about how awesome the other submissions for the cubebot challenge were, another about my direction for the undersized urbanite challenge, and another about intermediate dollhouse wiring (eyelets: types, uses, and installation). And I'm dying to catch up on all of you guys! I know I've missed a lot. Promise to deliver soon.

I knew I had you at demolition derby.
You forgive me.
Suckers.

Happy New Year!

Wednesday, April 25, 2012

Tutorial: Curtain rods with interchangeable finials

I decided to sneak this little bit in before I do the curtain panel tutorial. 
Since you'll be needing a place to hang said curtains. Obviously.
Or maybe you already have some miniature curtain rods hanging around collecting dust, but I didn't. So here's what I did.
The best part is that the finials are removable/replaceable, so you can change them on a whim, and in a jiffy.

You'll need:
-3/32" (or even slightly smaller) diameter metal tubing (comes in brass, aluminum, and copper).
-A hack saw, or scissors that you don't care about.
-A flat file suitable for metal.
-A pick (optional, yet helpful)
-2" head pins (maybe 1.5" for a skinny window), 2 per rod. (as in jewelry making supply, preferably in the same finish as your tubing)
-Beads for finials, at least two per rod.
-Eye hooks (really small ones, I think they're 1/8" size, can't be sure) These can be found in gold and silver-tone finishes. (seen below with ruler)


The easiest way to start, is to figure out how high/far apart you want the eye hooks on the wall, depending on your window size/location. The curtain rod will slip through these to hang, so try to keep them as level as possible (I just eye-balled mine, but I've got pretty level eyeballs).
You can even embellish these if you want. You'll see that I have, with wood or other beads. There's a reason, besides the added detail/realism.
Most of the beads I chose for my finials are 8mm-ish in size, and I didn't want them touching the walls, so I screwed the eye hooks into other stuff to get a little more clearance between the wall and the finial. Keep this in mind when you choose your finials. If it matters to you.

Enamel bead caps from Michael's

Scrap wood painted gold for this one.

And a filigree bead cap here.
Once you've got your eye hooks twisted into the walls, you're ready to make the rod. It's painfully easy. I buy this size (3/32") tubing in bulk in packages of 3-5 pieces, usually in 12" lengths at Hobby Lobby. That's the best deal I've found. And if I buy it with the weekly 40% coupon, it's basically a steal. I think it's between $3-$5 regularly for a  pack, depending on the metal.
Measure the distance between your eye hooks on the wall, add 1/2-5/8". That's how long your rod should be.
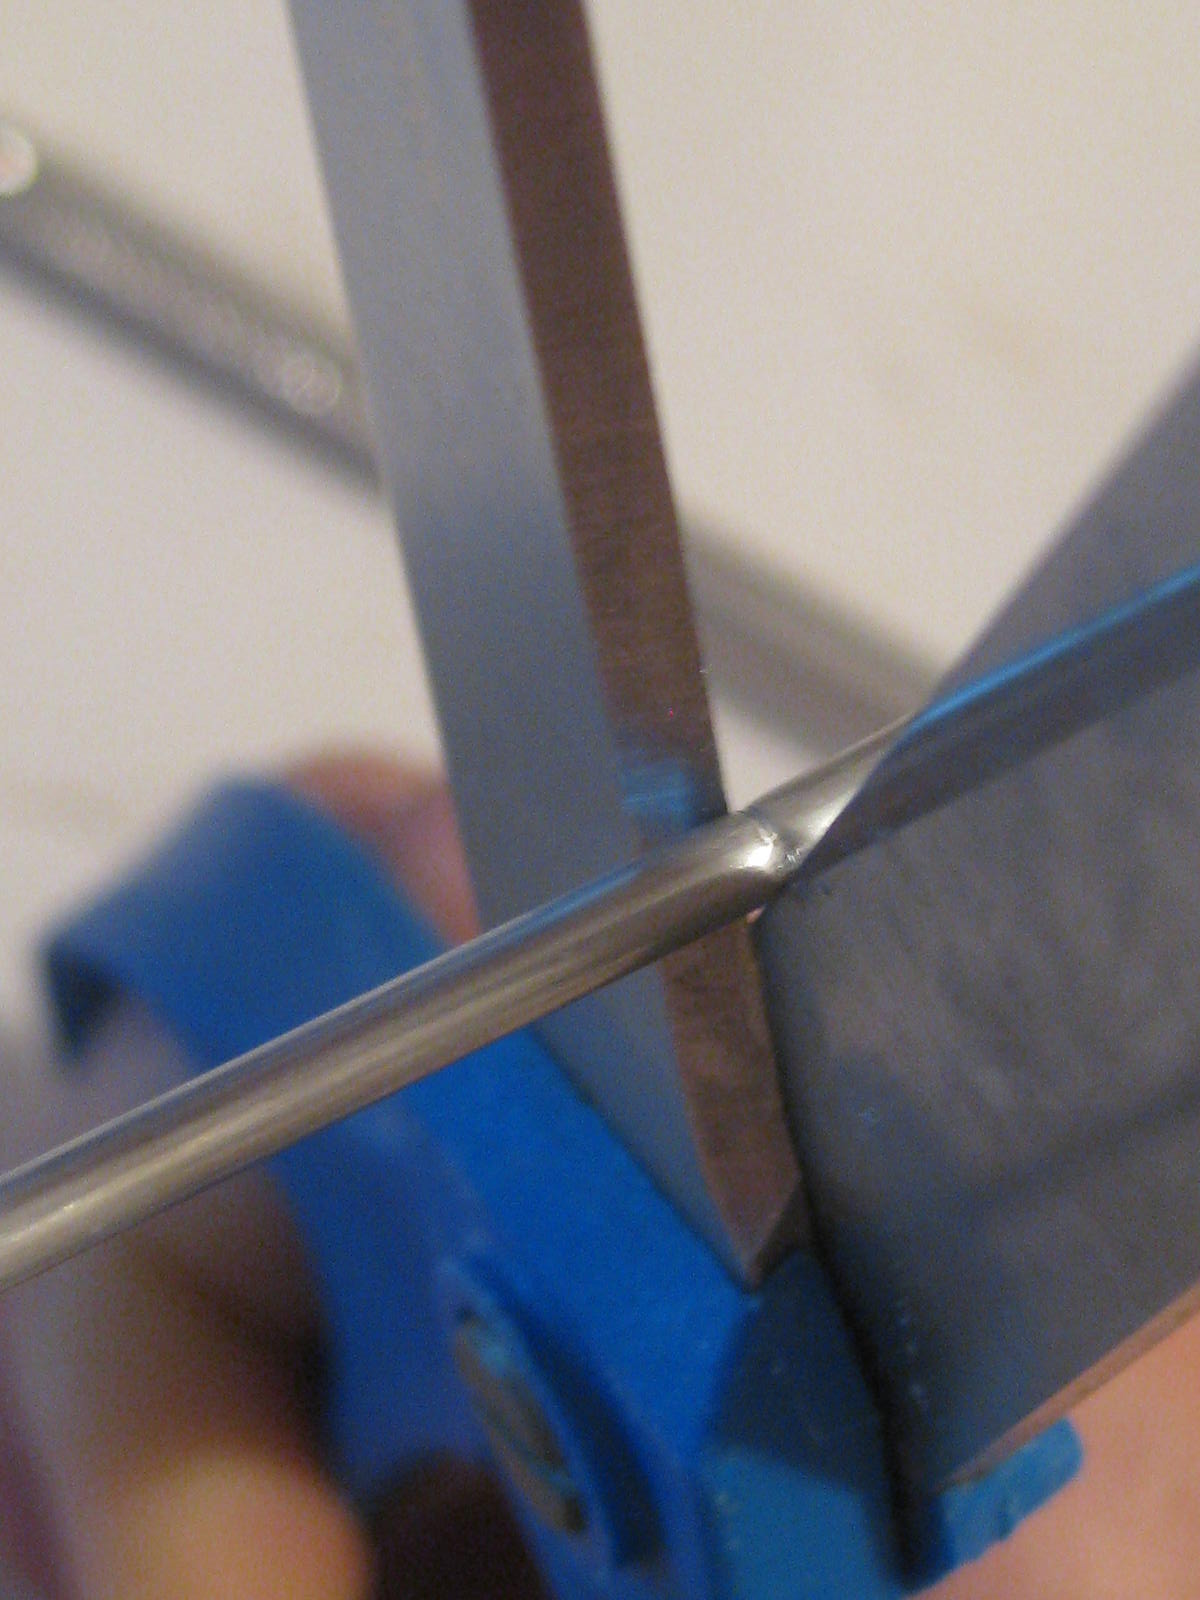
Using a hack saw/scissors trim a piece of tubing to that length, trying not to squish the tube in the process. Aluminum squishes more than the brass because it's softer. A hack saw really isn't necessary so long as you have an extra pair of scissors that you don't mind trashing. (My blue-handled scissors are my designated 'metal' scissors. I don't use my fabric Fiskars on this shit. I'm that type A. But it definitely pays to take care of your more expensive tools.)
This is a straight scissor-cut on aluminum. Yep. Squished.
Not really a big deal, as long as you have an appropriately sized pick (you'll see in a minute).
Here's my go-to set, (I've had them for over a decade). Plus the one you saw go through my finger here.

I recommend doing the following for the best cut, especially with brass (it's the method with the least waste, I hate wasting metal):
Gently, make a groove around the tube, and keep working it slowly. Carefully bend the tube back and forth on either side of the groove and it should break pretty clean:
But knowing me, we'll make it cleaner.

I still use the pick to make the end perfectly round (optional, the file will do just fine if it's all you've got):


I love my file set from Peep's shop, but the flat one above is the most versatile most used in my collection. And I've had it since high school, it's from my N-gauge days.

Using your file, make the fresh-cut nice and smooth.
Easier than a manicure.
After that you're as good as finished.

Add desired beads to each head pin to make the finials, then give the remaining length of the head pin a few gentle bends (last photo in group below). This will keep the finials from falling out, gives them a bit of 'grab' inside the tube without needing glue. Interchangeable! I love versatility, especially when it's so cheap.
Old pink round finial vs. green leaf finial. Thoughts?

I used 3 bead finials in my living room.
 Go as crazy or as sane as you please. For the sake of boring tutorials, I'll stay consistent...
 Here's that bendy part I mentioned:

These are vintage glass leaf beads I had on hand.
Then insert pins on each end of the rod, and shazam! Fancy, custom rods and finials for your mini curtains.


Just pull out one finial, slide through the eyehooks (add a curtain in the middle) then shove it back in there on the other side.


Very swanky, indeed.
I might like the green leaves better than the round Swarovski finials for this room. I'll leave it and let it simmer for a while.

If you try this tutorial and happen to write about it, please link back to my original post. Thanks!

I should have the 'grommetted curtain panel tutorial' done and posted by the end of the upcoming weekend, if not sooner. (As you can see above, you can use the sheerest, most unforgiving fabrics, and you can't even tell it's a no-sew project. I'm really proud of this design. Even if grommetted curtains aren't 'in' anymore.)
Then my blog to-do list will be fairly well caught-up! Holy mackerel, I thought that would never happen.

Since I can't help myself, and I sometimes show you non-miniature things here... I'll show you what we just bought tonight. Ridiculous, but I had to have it. You know the feeling? I'm still reeling from the excitement.

vintage motor home
1980 Winnebago.
31'. Not miniature. 

Oh.
Mah.
Gah.

Totally pumped. Clear my goddamn schedule.