Here's the moment I've been impatiently waiting for, she's done.
Well, mostly. I'll try and keep this short and sweet. The lighting for these pictures is the worst. It starts getting dark here around 4pm.
Shouldn't matter, since you'll be seeing plenty of the roombox in the coming months days. So, without further ado:
TA DA!
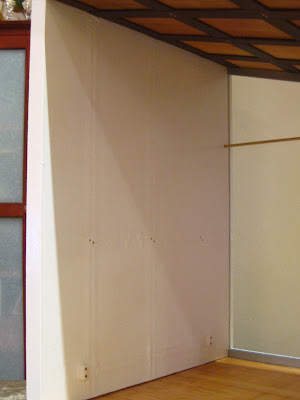
The inside tall wall has 3 sconce outlets and 2 corded plug outlets.

Ditto for the short wall. Except the sconces are lower for sofa/bedside/office applications.
The ceiling has 9 outlets.
The utility wall. Electrical input connection, and removeable curtain rod.
The patio/porch has 3 sconce outlets, 3 ceiling/roof outlets, and 2 corded plug outlets.


The back view.
Interesting features:
Leveling base.
Quick-cut templates. I made craft-paper templates of the walls and floors, so all I need to do is trace and trim desired wallcovering/flooring to match.
So far, I can't think of anything I would do differently. I got the outcome I desired, learned a few techniques along the way, and got semi-comfortable with some new materials. That's always my goal with a new project.
Venture out of your comfort zone, and you'll make way cooler stuff. Period.
I now have a completely custom, one of a kind, highly electrified, self-leveling, versatile, style-neutral, scratch-built structure. Happy girl.
Somehow, I miraculously found time to do some exterior work. I had a bottle of Greenleaf brand dollhouse stucco lying around for the past 15-20 years, so I figured I should go ahead and try it. I mixed it with some latex paint from the house (instructions said to use paint or water). It's a Martha Stewart color from Lowe's called 'soapstone'. It's my favorite pale gray/beige go-with-everything color. Once I painted a thick coat on and let it set a bit, I used a copper scrubber pad to texture it. I blotted until I had a consistent texture. I did two coats on each wall, which helped hide my electrical wires. (As seen in above photos)
I also finally decided on shingles. There were so many lovely options, some very detailed victorian styles.
I went with the square ones. I know. Boring. But I have my reasons.
The roof was never meant to be a focal point. It would just look stupid if I left it unfinished. I didn't want to have some crazy distracting pattern up there, though.
The other thing is, I knew I wanted to do real cedar shingles, but that I wanted them gray. Once I got the shingles on, I had a hard time wanting to paint them. I have an unusual obsession with the beauty of natural wood color/grain.
There was this one house from "I'm a Giant" that inspired me to paint them, and I knew I'd be happier if they looked like this:
I love how old hers look. I'm jealous of that texture. The rest of the 'house' is really beautiful, too. You should go check it out, then come back and finish the rest of this.
I'm pretty happy with the overall appearance/color pallette of the roombox. Especially since I was able to use paint colors I had on hand from our 1:1 house. The exterior walls are from our basement, the roof is from our front door, and the white gloss interior walls are from the Winnebago. The stucco powder mix, I had on hand. I bought the large bag of 1,000 cedar shingles for $23. I have enough left for the rest of my life. I decided to paint the roof and finish the trim before assembling all the pieces. Just to save me from cleaning sawdust out of the C-channel trim.
The only thing I'm unsure of is how blue my roof looks. It really accentuates how much blue pigment is in our gray paint. It's an oil based paint mixed with citrus solvent to make more of a stain than opaque coverage. It looks sort of slate-ish, so I don't
hate it. I'll have to see how it looks in all types of light before I kneejerk-reaction-paint-it-black.
I also knew I wanted walnut fascia trim around the roof, so I finished it to match the interior walnut, then trimmed it in:
The stuff I needed to do to be able to use the roombox is done, and there are only a couple of items left on the list. These jobs can be completed while the structure is fully assembled:
-Organize utility wall
The taller exterior wall won't make it into official TinyFixation shop pictures if I can help it, so I'll be affixing a system to keep the transformer and lead-in wires tamed and contained when the structure is not in use.
-Decide if I want interior trim
Here's the thing. I love me some trim. In the dollhouse, I think that was one of the details that really helped make it look realistic. It almost kills me not to in the roombox, however the name of the game here is versatility. If I have trim in some places, it could prevent certain space plans. I think I'll be making a baseboard for each of the wooden walls (one pair in walnut, and one in white), but not glue them in. I'll paper the walls first, then use museum putty to attach the desired baseboard over the paper. These can be made on a scene-by-scene basis. There. Settled then. So glad we had this talk.
Now I gotta scramble to finish my
Cubebot Challenge entry, due tomorrow... eek!


.JPG)


